本文:
1.本單元延續[2-4如何啟用Gmail內研究室功能
(以啟用插入照片(或圖片)的功能為例)]單元,
請先將Gmail內研究室插入圖片的功能開啟
2.本單元示範在Gmail本文內插入圖片並加以說明,
寄給自己(本例為ycctest01@gmail.com
學會本單元,您就能製作圖文並茂的e-mail囉
2-4-1如何在Gmail信件內容中插入圖片
簡報檔連結及下載網址如下:
或


\
2 4 1如何在Gmail信件內容插入圖片 - Presentation Transcript
- 2-4-1 如何在 Gmail 信件內容插入圖片 楊乾中 2009/07 [email_address]
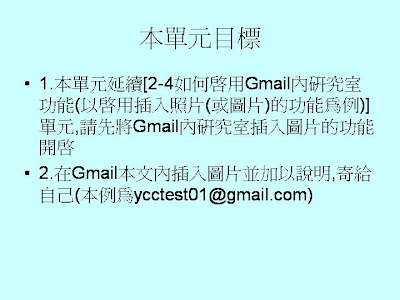
- 本單元目標
- 1. 本單元延續 [2-4 如何啟用 Gmail 內研究室功能 ( 以啟用插入照片 ( 或圖片 ) 的功能為例 )] 單元 , 請先將 Gmail 內研究室插入圖片的功能開啟
- 2. 在 Gmail 本文內插入圖片並加以說明 , 寄給自己 ( 本例為 ycctest01@gmail.com)
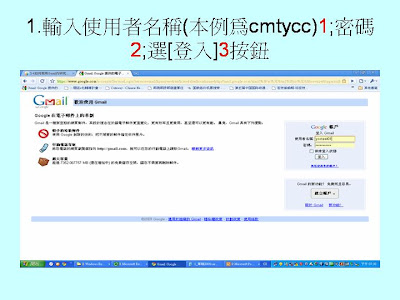
- 1. 輸入使用者名稱 ( 本例為 cmtycc) 1 ; 密碼 2 ; 選 [ 登入 ] 3 按鈕
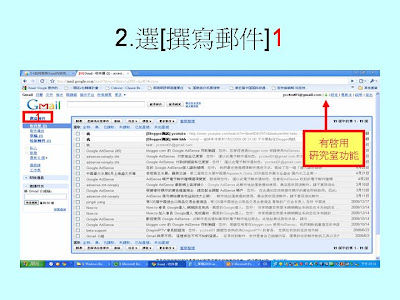
- 2. 選 [ 撰寫郵件 ] 1 有啟用 研究室功能 1
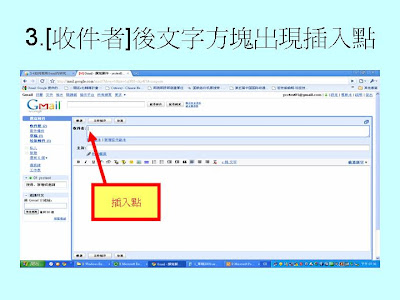
- 3.[ 收件者 ] 後文字方塊出現插入點 插入點
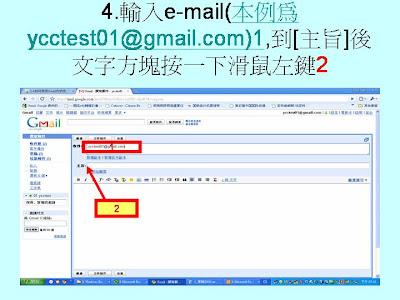
- 4. 輸入 e-mail( 本例為 ycctest01@gmail.com) 1 , 到 [ 主旨 ] 後文字方塊按一下滑鼠左鍵 2 1 2
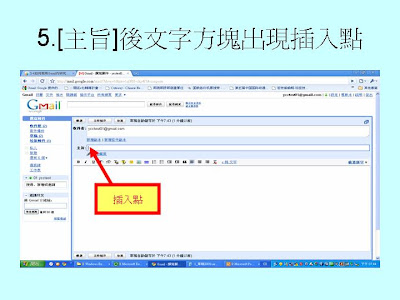
- 5.[ 主旨 ] 後文字方塊出現插入點 插入點
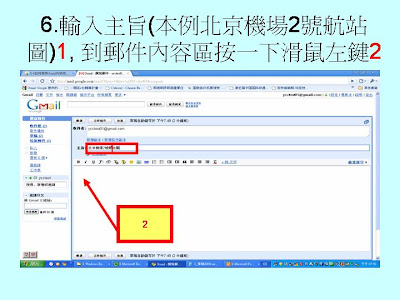
- 6. 輸入主旨 ( 本例北京機場 2 號航站圖 ) 1 , 到郵件內容區按一下滑鼠左鍵 2 1 2
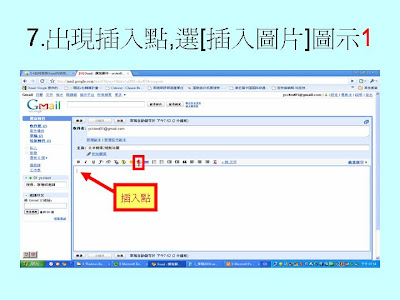
- 7. 出現插入點 , 選 [ 插入圖片 ] 圖示 1 插入點 1
- 8. 出現 [ 新增圖片 ] 頁面 , 選 [ 選擇檔案 ] 1 1
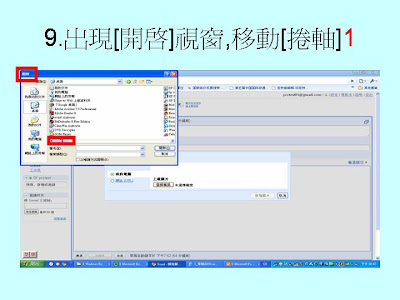
- 9. 出現 [ 開啟 ] 視窗 , 移動 [ 捲軸 ] 1 1
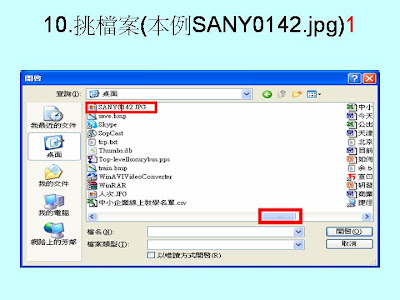
- 10. 挑檔案 ( 本例 SANY0142.jpg) 1 1
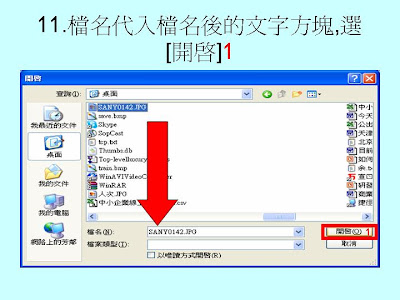
- 11. 檔名代入檔名後的文字方塊 , 選 [ 開啟 ] 1 1
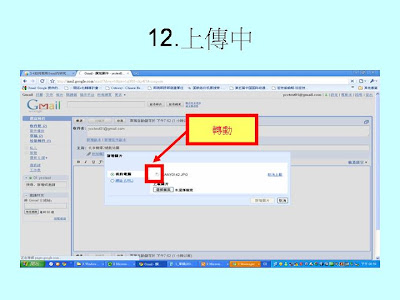
- 12. 上傳中 轉動
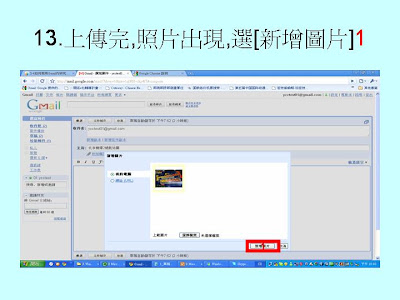
- 13. 上傳完 , 照片出現 , 選 [ 新增圖片 ] 1 1
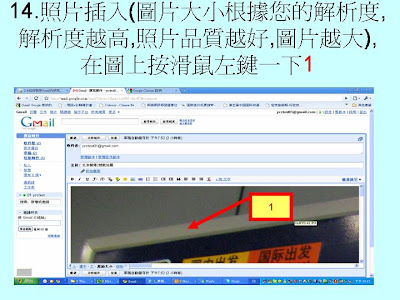
- 14. 照片插入 ( 圖片大小根據您的解析度 , 解析度越高 , 照片品質越好 , 圖片越大 ), 在圖上按滑鼠左鍵一下 1 1
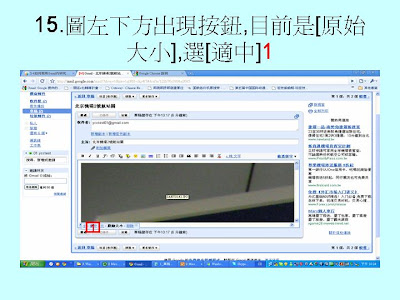
- 15. 圖左下方出現按鈕 , 目前是 [ 原始大小 ], 選 [ 適中 ] 1 1
- 16. 出現適中的尺寸 , 輸入文字 1 圖右方出現 插入點 , 輸入文字 1
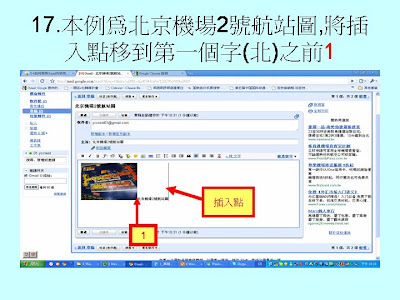
- 17. 本例為北京機場 2 號航站圖 , 將插入點移到第一個字 ( 北 ) 之前 1 插入點 1
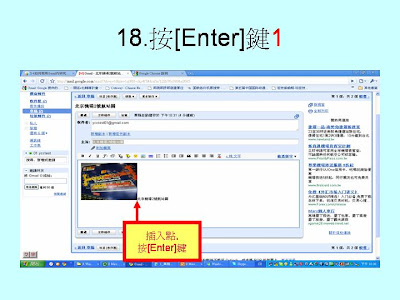
- 18. 按 [Enter] 鍵 1 插入點 , 按 [Enter] 鍵
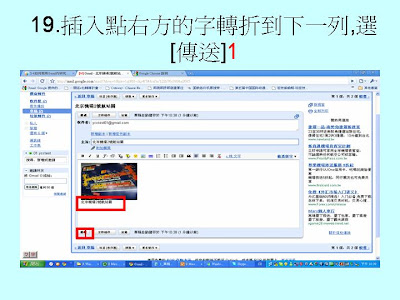
- 19. 插入點右方的字轉折到下一列 , 選 [ 傳送 ] 1 1
- 補充 1. 收到的 e-mail
- 收件者 ( 本例寄給自己 ycctest01@gmail.com) 收到 e-mail, 選信件標題 , 出現帶圖的 e-mail 如下兩張投影片
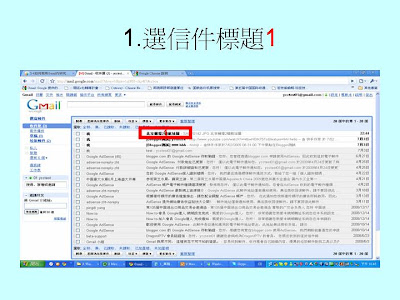
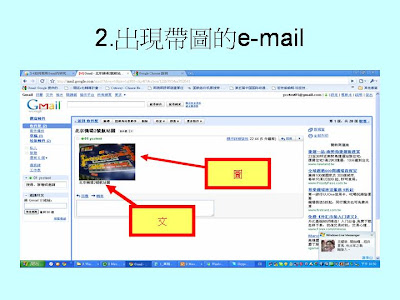
- 1. 選信件標題 1 1
- 2. 出現帶圖的 e-mail 圖 文
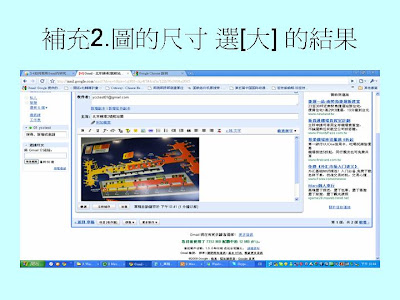
- 補充 2. 圖的尺寸 選 [ 大 ] 的結果
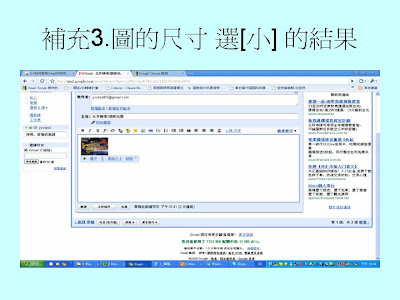
- 補充 3. 圖的尺寸 選 [ 小 ] 的結果
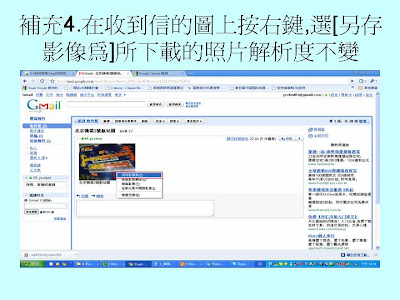
- 補充 4. 在收到信的圖上按右鍵 , 選 [ 另存影像為 ] 所下載的照片解析度不變


